Practical steps to create universal app with VS2015. Based on the oryginal post by Authored by Norm Estabrook with contributions from Raghav Katyal, Mikejo5001, rido-min,Linda Z with comments.
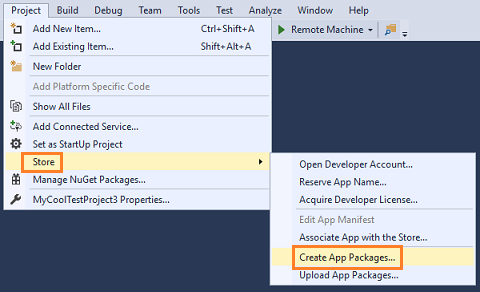
Package the iOS version of your app
Prerequisites
Install node.js
Checklist before publication
1. Make sure version number has been updated
It can’t be changed later on, during the process
2. Configure for Archive (iOS)
Before creating an archive make sure that development team is selected in general section of project’s configuration.
- Request a distribution certificate.
- Create a distribution provisioning profile.
- Download the distribution provisioning profile in Xcode.
- Modify the settings of your app.
- Create the package.
Simplified steps (iOS)
Prepare app to run on iPhone X
https://blog.phonegap.com/displaying-a-phonegap-app-correctly-on-the-iphone-x-c4a85664c493
Step 0: Run remote tools on Mac:
remotebuild –secure false
Stap 1: Run remote iOS build in Visual Studio
Step 2: Copy project from: /Users/leszekj/.taco_home/remote-builds/taco-remote/builds to your prefered directory on Mac
Step 3: Open project in Xcode from …/cordovaApp/platforms/ios
Step 4: Check icons and images in Xcode distribution. Icons are located in: \cordovaApp\platforms\ios\<App_name>\Images.xcassets\AppIcon.appiconset\
Make sure, that the icon set is correct.
Step 5: Update warnings to recommended settings
Step 6: Select a development team
Step 7: Update <app-name>-info.plist file > add
NSAppTransportSecurity
NSAllowsArbitraryLoads
NSExceptionDomains
your_json_source
to allow access to remote JSON sources
In case of problems with TSL
<key>NSAppTransportSecurity</key>
<dict>
<key>NSExceptionDomains</key>
<dict>
<key>flightplanning.navcanada.ca</key>
<dict>
<key>NSExceptionMinimumTLSVersion</key>
<string>TLSv1.0</string>
<key>NSExceptionRequiresForwardSecrecy</key>
<false/>
</dict>
</dict>
</dict>
Step 8: Run application on local device (iPhone or iPad)
Step 9: Run menu > Product > Analyze
Step 10: Run menu > Product > Archive
In case of error, uncheck “Automatically manage signing”, select development profile, and check again “Automatically manage signing”. Then re-run archive
https://stackoverflow.com/questions/40824727/i-get-conflicting-provisioning-settings-error-when-i-try-to-archive-to-submit-an
For those coming from Ionic or Cordova, you can try the following:
Open the file yourproject/platforms/ios/cordova/build-release.xcconfig and change from this:
CODE_SIGN_IDENTITY = iPhone DistributionCODE_SIGN_IDENTITY[sdk=iphoneos*] = iPhone Distribution
into this:
CODE_SIGN_IDENTITY = iPhone DeveloperCODE_SIGN_IDENTITY[sdk=iphoneos*] = iPhone Developer
and try to run the ios cordova build ios --release again to compile a release build.
Reference: https://forum.ionicframework.com/t/ios-build-release-error-is-automatically-signed-for-development-but-a-conflicting-code-signing-identity-iphone-distribution-has-been-manually-specified/100633/7
Step 11: Upload application to iStore from Xcode
______________
Full process:
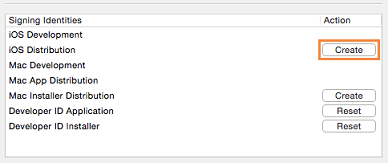
Step 1: Request a distribution certificate
A distribution certificate identifies your team or organization.
If your team already has one and you want to reuse it, see How to share an iOS distribution certificate. Then, skip straight to the Modify the settings of your app section.
If you don’t have a distribution certificate yet, continue on with this section and we’ll help you set one up.
- Start Xcode.
If you haven’t installed Xcode, see the First, install a few things onto your Mac section of the iOS setup guide.
- In Xcode, add your Apple ID (If you haven’t done so already).
See Adding an Apple ID to Your Accounts.
- In the menu bar, choose Xcode->Preferences.
- In the Accounts page, choose the View Details button.
- In the account details page, choose the Create button next to the iOS Distribution signing identity.
Looking for more information about signing identities? See Creating Signing Identities(Optional reading).
- Choose the Done button to close the account details page.
Step 2: Create a distribution provisioning profile
A distribution provisioning profile lets you submit your app to the store.
- On the Member Center page, choose the Certificates, Identifiers & Profiles link.
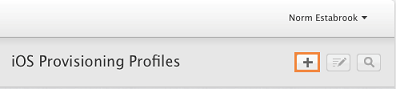
- In the Certificates, Identifiers & Profiles page, choose the Provisioning Profiles link.
- In the Provisioning Profiles page, choose the + button.
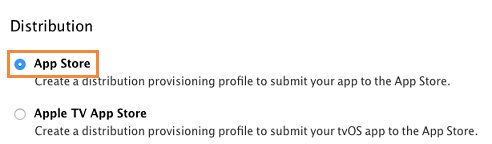
- In the What type of provisioning profile do you need? page, choose the App Store option, and then choose the Continue button.
- In the Select App ID page, choose the App ID of your app, and then choose the Continuebutton.

- In the Select certificates page, select the distribution certificate that you created earlier in Xcode, and then choose the Continue button.

- In the Name this profile and generate page, name your profile, and then choose the Generatebutton.
- In the Your provisioning profile is ready page, choose the Download button.
Need more detail? See Creating provisioning profiles using Member Center
Step 3: Download the distribution provisioning profile
- Open Xcode.
- In the menu bar, choose Xcode->Preferences.
- In the Accounts page, choose the View Details button.
- In the account details page, choose the Download button next to your provisioning profile’s signing identity.
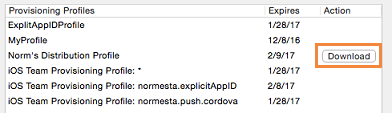
- Choose the Done button to close the account details page.
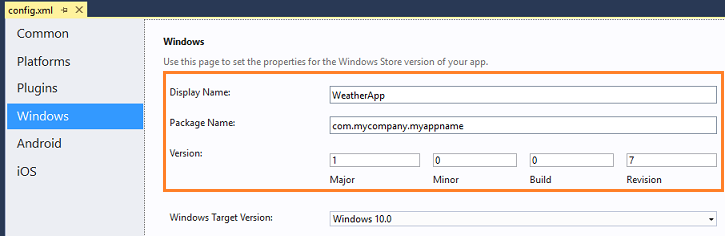
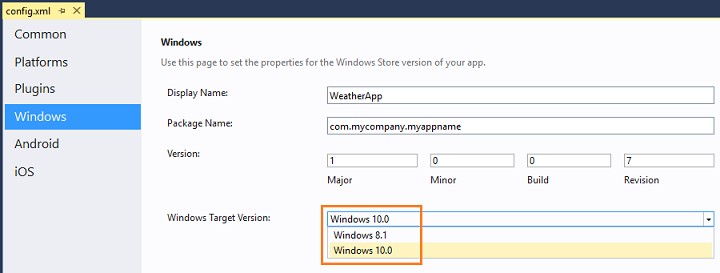
Step 4: Modify the settings of your app
The general settings of your app appear in the Common page of the configuration designer.
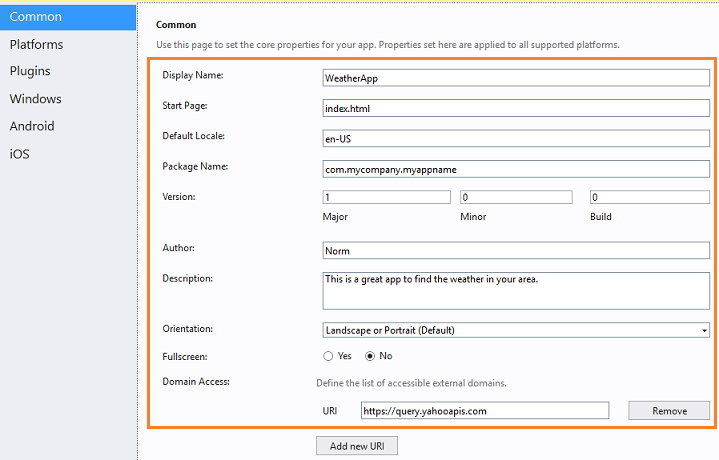
- The Display Name is the name that appears in the app store.
- The Package Name is a string that uniquely identifies your app.
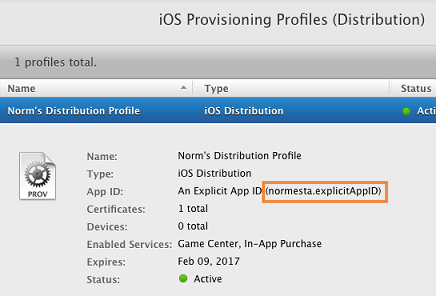
This identifier has to match the identifier of your distribution provisioning profile.
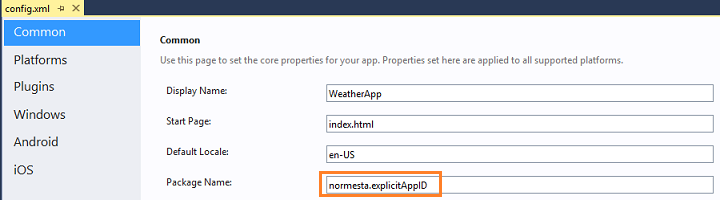
You can find the indentier of your profile by choosing your distribution profile in the Provisioning Profiles page of the Apple developer Member Center.
.
- The Domain Access collection lists the domains that your app needs to access.
For example, the WeatherApp that appears in the previous image, obtains weather data from a service endpoint that has the domain https://query.yahooapis.com.
The purpose of most other settings clear from the title, but you can find more information about them here: The config.xml File.
iOS-specific settings appear in the iOS tab of the configuration designer.
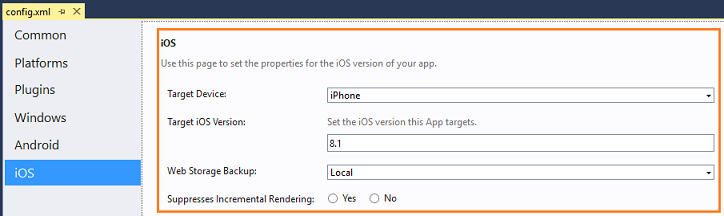
You can read about each option in the preference section of the config.xml reference topic.
Step 5: Create the package
Build your app to generate the package that you will submit to the store.
- On your Mac, make sure that the remote agent is running.
See Start the remote agent on your mac.
- In Visual Studio, open the project for your app.
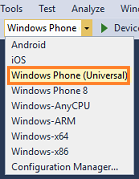
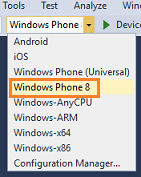
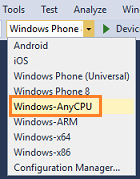
- On the Standard toolbar, choose the iOS platform.

- Choose Remote Device.
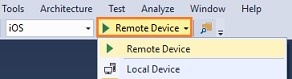
.
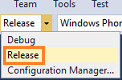
- Choose the Release build configuration.
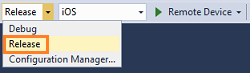
- On the Build menu, choose Build Solution.
This starts a build on the remotebuild agent and uses the distribution certificate and the matching provisioning profile to build a release signed iOS Application Archive (.ipa) file.
You can find that file in the bin/iOS/Release folder of your project.
Submit your app to the store
- Copy the .ipa file into a folder on your Mac.
- Create an iTunes Connect Record for your app.
- Use the Application Loader to upload your .ipa file to iTunes.
Apple reviews your app. If they don’t accept it, you’ll receive an email that explains the reason and what you can do to fix it. These articles describe common reasons why apps get rejected.
Common Problems
iFrame navigation
If you are using iFrames, links might open in new Safari window.The work around is described in the following post [1].
First, add the following to confine.xml
<allow-navigation href=”https://remote.zensystem.pl” iframe=”true” />
I was facing this issue for a new application I’m working now, and it seems that is related with new whitelisting mode in Cordova iOS > 6. For us, I have made a workaround for allow navigation inside iframes (I can’t be sure if it could generate any other problem, but for now we haven’t seem anyone). In cordova project, at Private/Plugins/CDVUIWebViewEngine/CDVIntentAndNavigationFilter.m, we’ve just modified the shouldOverrideLoadWithRequest:navigationType: method, changing the behaviour when a navigation is requested via UIWebViewNavigationTypeLinkClicked.
With the new Cordova behaviour, in that case it stops navigation, and open it in system browser; I’ve commented that line ([[UIApplication sharedApplication] openURL:url]; ) and modified the return, to return YES; and with this two changes it is working as previous versions of cordova.
TIP: Just search in Xcode for UIWebViewNavigationTypeLinkClicked
![]()
Create iOS icons and splashes for the application
Create splashes with: http://ticons.fokkezb.nl
![]()
References
[1] http://stackoverflow.com/questions/36572869/why-are-links-inside-an-iframe-opening-in-system-safari