Practical steps to create universal app with VS2015. Based on the oryginal post by Authored by Norm Estabrook with contributions from Raghav Katyal, Mikejo5001, rido-min,Linda Z with comments.
Package the Windows version of your app
First, decide which platforms and device families you want to make your app available to. You can make your app available to Windows Phones, desktop PCs, and tablets.
It doesn’t matter which version of Windows the app targets. The Windows store accepts all of them. That said, the operating system of a device or PC only runs apps that target the same version of that operating system or an earlier version.
To learn more about Windows package and Windows device compatibility, see OS versions and package distribution.
In this section:
- Modify the settings of your app.
- Make your app available to Windows Phones.
- Make your app available to Windows desktop PCs or tablets.
- Install your app on a device or publish it to the store.
Modify the setting of your app
The general settings of your app appear in the Common page of the configuration designer.

- The Display Name is the name that appears in the app store.
- The Package Name is a string that uniquely identifies your app.
Choose a naming scheme that reduces the chance of a name conflict.
- The Domain Access collection lists the domains that your app needs to access.
For example, the WeatherApp that appears in the previous image, obtains weather data from a service endpoint that has the domain https://query.yahooapis.com.
The purpose of most other settings clear from the title, but you can find more information about them here: The config.xml File.
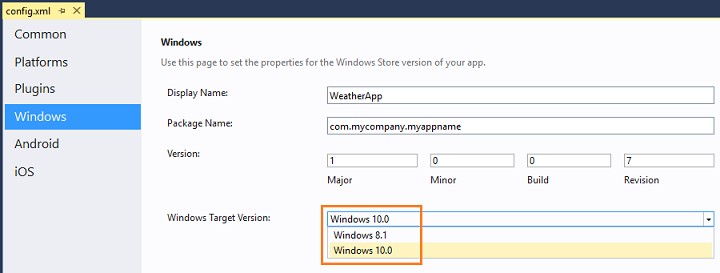
Windows-specific settings appear in the Windows tab of the configuration designer.
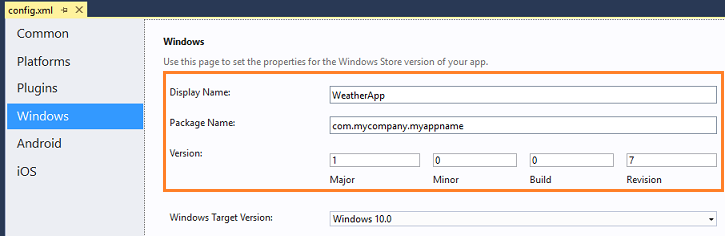
You might have noticed that the this page shares three of the same field names as the Common page (Display Name, Package Name, and Version).
In the Create App Package Wizard (which you’ll use later) you might have to choose a different display name or package name because of Windows-specific naming requirements, the name has already been reserved by someone else, or if you want to associate your app with a name that you’ve previously reserved.
In any of these cases, Visual Studio updates the Display Name and Package Name on the Windowspage once you’ve completed the wizard. That way your other platform targets are not forced to use those names.
The reason why this page has a Version field is because Windows uses a 4 digit version number instead of a 3 digit one. You can either modify this field directly or let Visual Studio set this field based on the version number that you choose in the Create App Package Wizard.
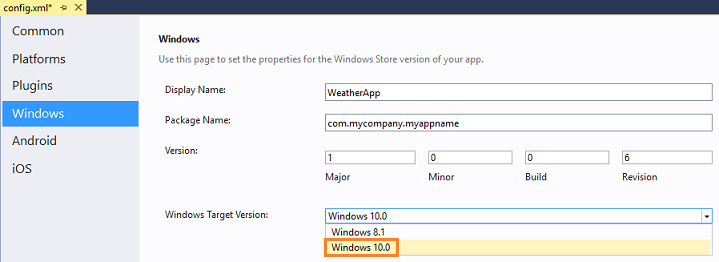
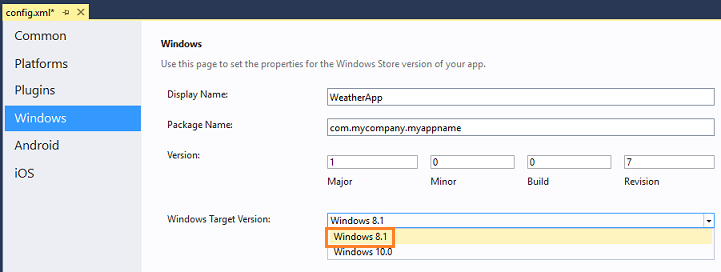
We’ll look at the Windows Target Version field in the next section.
Make your app available to Windows Phones
Which version of Windows does your app target? Choose a section:
YOUR APP TARGETS WINDOWS 10
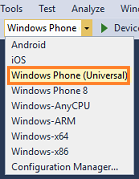
- In the Standard Toolbar, choose Windows-ARM.

- In the Windows page of the configuration designer, choose Windows 10 from the Windows Target Version dropdown list.
.
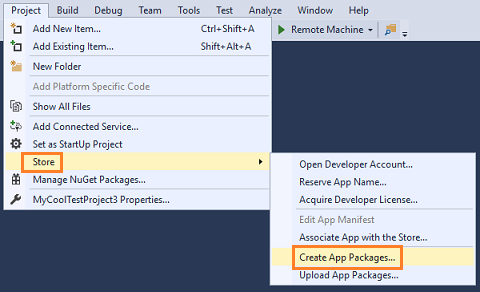
- Choose Project->Store->Create App Packages to start the packaging wizard.

- Complete the wizard.
For step-by-step guidance, see Create an app package
- Find your packaging files in the AppPackages folder in the root of your project.
- Install your Windows app onto a device or publish it to the store.
YOUR APP TARGETS WINDOWS 8.1
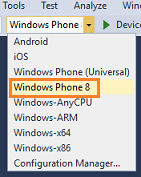
- In the Standard Toolbar, choose Windows Phone (Universal).
- In the Windows page of the configuration designer, choose Windows 10 from the Windows Target Version dropdown list.
.
- Choose Project->Store->Create App Packages to start the packaging wizard.
- Complete the wizard.
For step-by-step guidance, see Create an app package
- Find your packaging files in the AppPackages folder in the root of your project.
- Install your Windows app onto a device or publish it to the store.
YOUR APP TARGETS WINDOWS PHONE 8
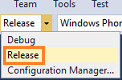
- In the Standard Toolbar, choose the Release configuration.
- Choose Windows Phone 8.
- Choose Build->Build Solution to build your package.
- Find your packaging files in the bin\WindowsPhone8\Release folder in the root of your project.
- Install your Windows app onto a device or publish it to the store.
Make your app available to Windows desktop PCs or tablets
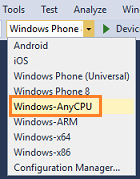
- In the Standard Toolbar, choose Windows-AnyCPU.
- In the Windows page of the configuration designer, choose Windows 10 or Windows 8.1 from the Windows Target Version dropdown list.
.
- Choose Project->Store->Create App Packages to start the packaging wizard.

- Complete the wizard and in the wizard choose which platforms you want to make your app available to.
For step-by-step guidance, see Create an app package
- Find your packaging files in the AppPackages folder in the root of your project.
Install your Windows app onto a device or publish it to the store
To publish your app to the store, see Publish Windows apps.
To install your app directly onto a device Sideload your app package.
